
Crafting the perfect cup of coffee at home is incredibly satisfying, and learning how to steam milk on the Breville Barista Express is a critical step toward creating that smooth, velvety microfoam found in lattes and cappuccinos. My early attempts often resulted in frothy milk with large bubbles, but with practice, my skills significantly improved. If you find yourself struggling with the steam wand or simply want to elevate your technique, this guide will help you master the art of steaming milk for cafe-quality results. Uncover the brewing precision of the Breville Dual Boiler BES920XL review
Getting Familiar with the Breville Barista Express Steam Wand
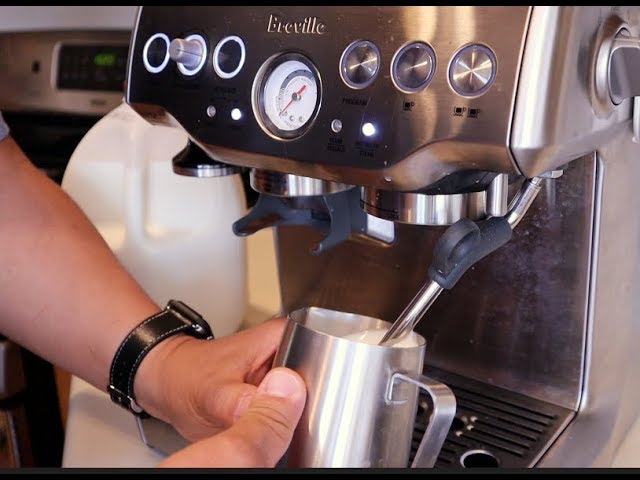
The Breville Barista Express is a versatile espresso machine that features a steam wand capable of swiveling 360 degrees for easy positioning. Make sure your machine is fully preheated before you begin. Wait for the indicator lights to confirm readiness—steaming with a partially heated wand will produce subpar foam, so patience is key. Learn how this model blends convenience with innovation in the Breville Barista Touch Impress review
Preparing Your Milk for Steaming
The type of milk you use has a big impact on the quality of your foam. Whole milk yields a creamy, rich consistency, while skim milk provides a lighter froth. Plant-based alternatives like almond, soy, or oat milk can also be used, though they require slight technique adjustments due to differing fat and protein levels. Compare these top models to find your perfect match in the Breville Barista Express Impress vs Pro review
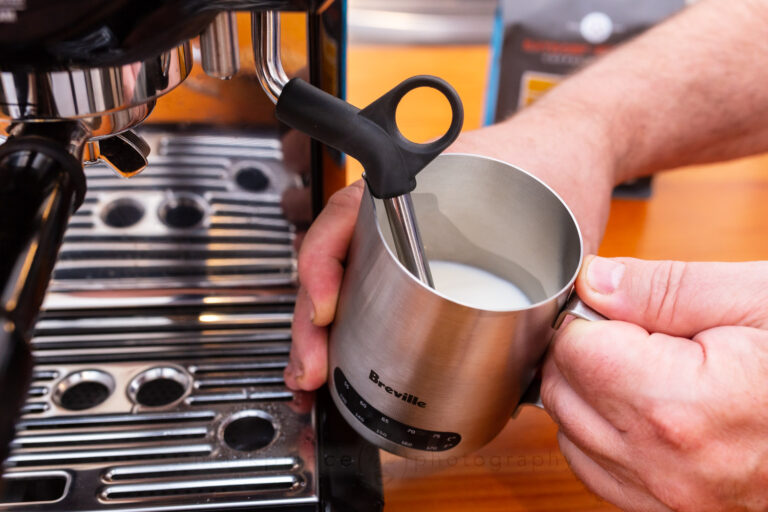
For optimal results, use a stainless steel milk jug for its excellent heat conductivity, which allows you to gauge the temperature by touch. For a single serving, use a 12-ounce jug and fill it one-third full with cold milk—this gives enough room for the milk to expand while steaming. See what makes these machines stand out in the Breville Barista Pro vs Express review
Step-by-Step Guide to Steaming Milk
Purge the Steam Wand
First, purge the steam wand by briefly turning it on to expel any condensation. This ensures you are working with dry steam, which is crucial for achieving smooth, consistent microfoam. Skipping this step may cause inconsistent, watery results. Explore the key differences between these premium machines in the Breville Oracle vs Oracle Touch review
Proper Positioning of the Steam Wand
Position the steam wand just below the milk's surface, keeping it close to the jug's spout while tilting the jug slightly. This setup helps incorporate air and creates the whirlpool motion needed for even texture.
Stretch the Milk (Incorporate Air)
Turn the steam knob to full power and listen for a gentle hissing sound as air is introduced. Keep the wand near the surface for the first few seconds to "stretch" the milk by adding air. This forms a creamy texture—but be careful not to overdo it, as too much air will lead to large bubbles instead of fine microfoam.
Texture the Milk
After adding enough air—generally between 3 to 5 seconds—raise the jug slightly to fully submerge the wand. This step heats the milk while maintaining a whirlpool effect, breaking down larger bubbles and creating a silky microfoam. The goal is a glossy texture resembling wet paint.
Monitor the Temperature
Use your hand to feel the jug’s temperature. When it becomes too hot to hold comfortably for more than a second, it's time to stop—this is approximately 150°F (65°C). If you prefer precision, you can use a thermometer. Avoid overheating, as it will burn the milk and reduce its natural sweetness.
Shut Off the Steam Wand
Always turn off the steam wand before removing it from the milk to prevent splattering. Once the wand is off, carefully remove it and set the jug aside, keeping the process mess-free and safe.
Final Touches for Perfect Milk Texture
Tap and Swirl the Milk
Once you finish steaming, gently tap the jug on the counter and swirl it to eliminate any remaining bubbles. This step is key to achieving a smooth, glossy finish that’s perfect for pouring.
Clean the Steam Wand Immediately
Wipe the steam wand with a damp cloth immediately after steaming and purge it again. This prevents milk residue from accumulating, which could lead to clogging and reduced performance over time.
Pouring the Milk
Slightly tilt your cup and begin pouring the milk slowly, aiming for the center of the espresso. Start from a higher point to help integrate the milk and espresso, and lower the jug as you pour to gain more control—especially useful if you’re attempting latte art. With enough practice, you'll soon be able to create hearts, leaves, and other designs.
Helpful Tips for Steaming Milk
Practice Regularly
Perfecting milk steaming requires practice. Don’t be discouraged by early attempts; experimenting with different techniques and milk types will help you improve your skills over time.
Choose Fresh Milk
Fresh milk is best for foaming due to its higher protein content. Always check expiration dates and avoid using milk that has been open for too long.
Experiment with Various Milk Types
Different types of milk froth in unique ways. For example, oat milk, particularly barista-style versions, is excellent for creating plant-based microfoam.
Common Pitfalls to Avoid
Over-Aeration
Adding too much air while steaming results in large, uneven bubbles, ruining the desired texture. Always aim for a gentle hissing sound to incorporate just enough air.
Overheating the Milk
Milk scorches at 170°F (77°C), which leads to a burnt flavor and a loss of sweetness. Stop steaming before reaching this temperature to preserve the milk’s natural sweetness and creamy consistency.
Neglecting Wand Maintenance
Failure to properly clean and purge the steam wand can cause clogging and sanitation issues. Consistent cleaning ensures optimal performance and helps prevent bacterial growth.
Discover the World of Latte Art
Once you've mastered steaming milk, you can take on the challenge of latte art. Start with simple designs, like hearts or tulips, and work your way up to more intricate patterns. While it can be challenging at first, creating latte art adds a fun, personal touch to your coffee.

Conclusion: Elevate Your Coffee Game with Perfectly Steamed Milk
Mastering the art of steaming milk on the Breville Barista Express has taken my home coffee experience to new heights. With practice, dedication, and a solid understanding of the techniques, you can also create beautifully textured milk for lattes, cappuccinos, and even stunning latte art.
Whether you're perfecting your morning latte or experimenting with creative designs, making cafe-quality coffee at home is a joy worth pursuing. So fire up your Breville, grab your milk jug, and dive into your coffee journey—you’re just a steam away from perfection!